ShopDreamUp AI ArtDreamUp
Deviation Actions

If you use the GIMP for the 2D portions of your texturing, it has some useful scripts and features for the render artist, including in the area of postwork. I recently ran across this feature after completely missing it for years, so I just had to share it with you all!
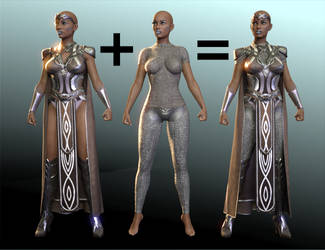
Here's a before and after look using our BSI set and the Jax textures from Daz3D (the morph is Legacy Darius plus Legacy Gianni 6).

1. Open your rendered image in the GIMP.
2. Click on the Filters menu option, then Light And Shadow.
3. Choose Lens Flare or Gradient Flare. Gradient Flare has a lot of different options where Lens Flare is much simpler.
4. A dialogue box pops up. For Lens Flare, just click the point in the preview where you want the lens flare to go, and then click OK.
5. For Gradient Flare, pick a flare option from the Selector list, click where in the preview you want it to go, then go to the Settings tab.
6. The Radius lets you determine how large the flare is. Hue rotation determines the color. Vector Angle and Vector Length determine where the "arm" of the flare with its bokeh will point and how long it will be. Click the preview where you want the flare to start and play with the sliders until you get a result that you like.
7. In the demo, the top right pic shows the plain Lens Flare. The bottom right shows the "Distant Sun" option with its yellow color and medium radius. And the "Gflare x3" option shows what you can do by repeatedly layering some different flares.
Have fun with it! I look forward to seeing what you all can do with this quick, easy and fun form of postwork. (Smile)")
Here's a before and after look using our BSI set and the Jax textures from Daz3D (the morph is Legacy Darius plus Legacy Gianni 6).
Here's how you do it!
1. Open your rendered image in the GIMP.
2. Click on the Filters menu option, then Light And Shadow.
3. Choose Lens Flare or Gradient Flare. Gradient Flare has a lot of different options where Lens Flare is much simpler.
4. A dialogue box pops up. For Lens Flare, just click the point in the preview where you want the lens flare to go, and then click OK.
5. For Gradient Flare, pick a flare option from the Selector list, click where in the preview you want it to go, then go to the Settings tab.
6. The Radius lets you determine how large the flare is. Hue rotation determines the color. Vector Angle and Vector Length determine where the "arm" of the flare with its bokeh will point and how long it will be. Click the preview where you want the flare to start and play with the sliders until you get a result that you like.
7. In the demo, the top right pic shows the plain Lens Flare. The bottom right shows the "Distant Sun" option with its yellow color and medium radius. And the "Gflare x3" option shows what you can do by repeatedly layering some different flares.
Have fun with it! I look forward to seeing what you all can do with this quick, easy and fun form of postwork.
Default VS. PBR Skin Shader: Alexandra 8 Tests
User @DigitalHallucination had some interesting comments and questions about shaders under the old Iray Surfaces tutorial from 2015. That led to some experimentation with shaders this morning, the results of which I will share now. Please, please feel free to comment and debate. I think this is an issue of interest to more or less all of us. I commented offhand that I didn't think the PBRSkin shader was an improvement, but that the maps in use were what made the difference, and DH disagreed with this and provided some comparison renders using Alexandra 8. They definitely looked definitive, so I decided to run my own tests. At first I tried it with base G8F, but that wasn't an apples to apples comparison because G8F originally uses the old glossiness method, so she's going to look worse compared to any shader that uses the new spec. So, like DH, I went to Alexandra. In this case I used the default lighting with the camera headlamp turned off, Subd1, Alexandra 8 at 100%, and the
Deviantart's Default AI Opt-In
EDIT: They put in a mass opt out! Thanks for letting me know when I missed the news, lovely watchers! I'm not thrilled about dA making AI opt-out and not opt-in, and putting it so you have to opt-out on each individual artwork. I have little to lose from this, because my product is 3D models and not the 2D promotional images, but it's especially predatory of people whose product and ouevre is 2D art. I don't know how many people are still here, but it's one more reason for people who draw and paint to delete their accounts.
Color Differences in DS 4.20.1.38
This was introduced by my notice by Snarl, and verified by my own render testing. I will show my results in the following discussion. There is a visible color difference in Iray render results in Daz Studio 4.20.1.38 vs. the pre-VDB, pre-ghost light fix 4.16.1.21 build I was able to test against. I rendered out to pngs and looked at both pngs on the same monitor to account for that type of differences. Here shown is G8F up close in default lighting on both builds. I checked all of the render settings to make sure they were the same, too, because if we could just change a render setting it would be an easy fix. This difference is relatively subtle. Let me show those separately so you can download them separately to compare. Here's 4.20: And here's 4.16: You might have to zoom in and set them overlapping so you see top part and top part or right and right, etc., but it's there. I don't know how or why this change has happened. Maybe it's because Daz decided the default was too
Babbling About Fluid Simulation
I have some feelings about sims right now. I have a lot of them, and I've just had caffeine. So I'm going to share them with you all. So, I recently submitted a water set for Daz Studio. Three times. You see, Daz3d didn't like either of my first two interpretations of the slosh pieces and pouring pieces that were simulated in Blender, so I ended up having to hand-sculpt parts of it and combine that with parts of the simmed pieces. The sloshes are entirely hand-sculpted from me staring at photo references, except for bits of the flying droplets I salvaged from the original simmed meshes. I wouldn't even have gotten that far if not for the very specific and detailed feedback they gave me, a privilege of working with the Review committee since 2011 and, I sincerely hope, demonstrating an eagerness to accept professional criticism when it gets me paid. I know for a fact that they have some artists where they just say an unvarnished yes or no because it's not worth getting yelled at
© 2016 - 2024 SickleYield
Comments10
Join the community to add your comment. Already a deviant? Log In
Your tutorials are always clear and easy to understand. Thanks!